A fast, productive UI framework for Rust from the creators of Zed.
官方的介绍特别有趣,“今天,它是 Zed 的 UI 框架,明天,是你的!”,“我们希望您能帮助我们实现这一目标。”。是不是很有意思,很大诚意的邀请你使用它,开发它,让它创造更大的价值,这就是开源精神。从来不怕你抄袭,只希望你能一起完善它等等。
Today, it’s Zed’s UI framework. Tomorrow, it’s yours!
We’d love your help making that happen.
| 相关知识 | 说明 |
|---|---|
| gpui – README | Intro to gpui (gpui’s README) |
| gpui – gpui.rs | Core functionality and API of gpui (gpui’s crate root) |
| Contexts | Explanation of different contexts in gpui |
| Key Dispatch | Details on key event dispatching in gpui |
| 案例 | 说明 |
|---|---|
| Hello World | The basic “Hello, World!” example |
| Animation | Rotating SVG animation |
| GIF Viewer | GIF image in a window |
| Image | Loading and displaying images |
| Input | Basic text input field |
| Opacity | Changing opacity with animations |
| Set Menus | Application menus creation and usage |
| Shadow | Element with shadow |
| SVG | SVG images with different colors |
| Text Wrapper | Text wrapping techniques |
| Uniform List | Optimized scrollable list using uniform heights |
| Window Positioning | Window positioning techniques |
| Window Shadow | Custom window shadows and resizing |
| Window Window | types and operations |
尝试使用 gpui 写一个 hello world 的桌面程序
官方还没有提供 gpui 相关的文档,可以在代码仓库里看到一些案例。如果你想学习或者将这套 UI 框架应用到自己的桌面程序中的话,需要自己消化这些代码,提取相关的信息。
接下来我们来实现一个简单的入门程序。通过如下命令创建一个项目 gpui-test-rs。
cargo new gpui-test-rs
编辑 Cargo.toml,引入依赖 gpui 库。
[package]
name = "gpui-test-rs"
version = "0.1.0"
edition = "2021"

[dependencies]
gpui = { git = "https://github.com/zed-industries/zed" }
将官方提供的 Hello Word 源码直接覆盖 main.rs。
use gpui::*;

struct HelloWorld {
    text: SharedString,
}

impl Render for HelloWorld {
    fn render(&mut self, _cx: &mut ViewContext<Self>) -> impl IntoElement {
        div()
            .flex()
            .bg(rgb(0x2e7d32))
            .size_full()
            .justify_center()
            .items_center()
            .text_xl()
            .text_color(rgb(0xffffff))
            .child(format!("Hello, {}!", &self.text))
    }
}

fn main() {
    App::new().run(|cx: &mut AppContext| {
        cx.open_window(WindowOptions::default(), |cx| {
            cx.new_view(|_cx| HelloWorld {
                text: "World".into(),
            })
        })
        .unwrap();
    });
}
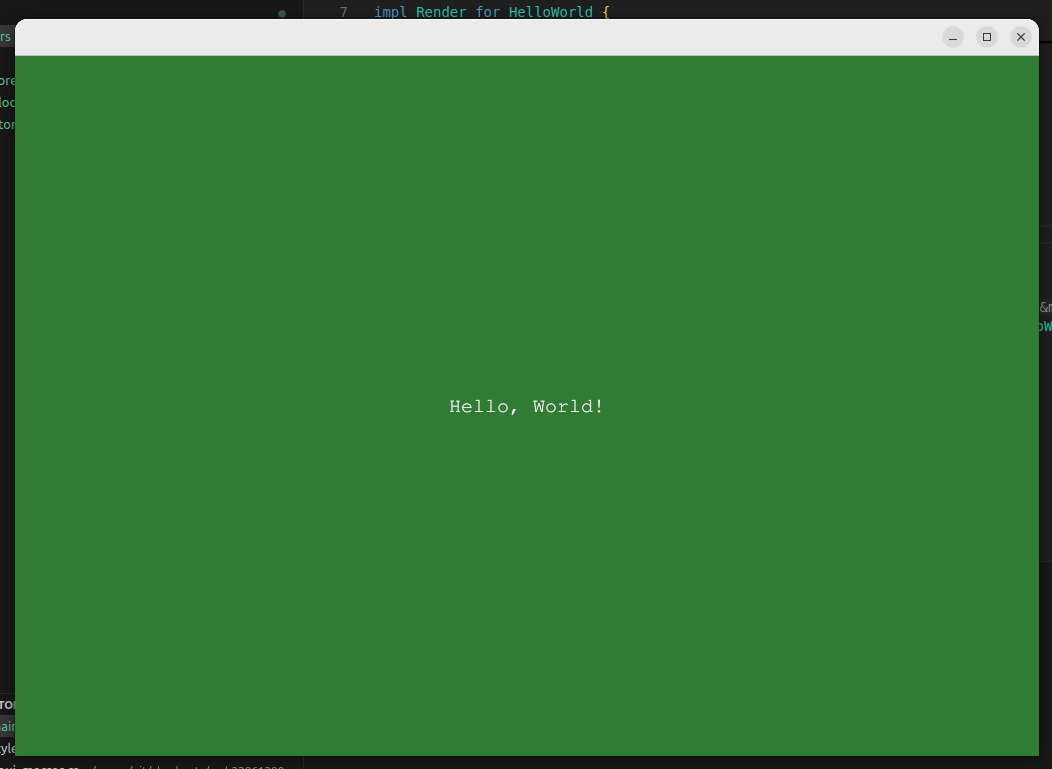
执行 cargo run 就可以看到生成的 Hello World 桌面程序了。

一些猜测
官方对这套 UI 框架提供了少量的文档,大部分的入门信息需要通过看代码,加上一些代码设计的猜测来提取。AppContext 是应用上下文,用来实现各个元素之间的消息传递,openwindow 打开一个窗口,ctx.newview 创建一个视图,HelloWorld 是我们自己实现的一个元素(基于 div 元素)。再看看 HelloWord 的 render 方法,如果你知道点 HTML + CSS 就会发现,div 是一个 HTML 的标签,后面一系列的链式方法就是 CSS 样式。child 方法表示这个 div 元素内嵌套的子元素,可以是 div,文本,图片等等。gpui 样式的设计应该借鉴了 tailwindcss,怪不得有点熟悉的味道。
/// crates/gpui/src/styled.rs
/// A trait for elements that can be styled.
/// Use this to opt-in to a utility CSS-like styling API.
pub trait Styled: Sized {
    /// Returns a reference to the style memory of this element.
    fn style(&mut self) -> &mut StyleRefinement;

    ...

    /// Sets the display type of the element to `block`.
    /// [Docs](https://tailwindcss.com/docs/display)
    fn block(mut self) -> Self {
        self.style().display = Some(Display::Block);
        self
    }
    ...
}
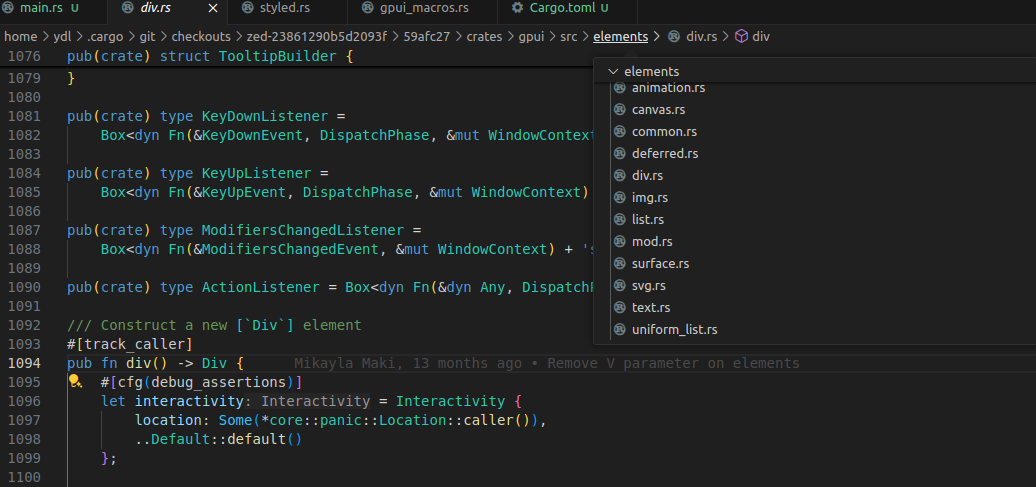
gpui 的元素并没有包含所有的 HTML 标签,包含了一些常用的元素,比如:动画,列表,块级元素,画板,图片,SVG 等等。有了这些基础的元素,我们可以在这个基础之上设计自己需要的元素。

扩展知识,gpui-component 组件库
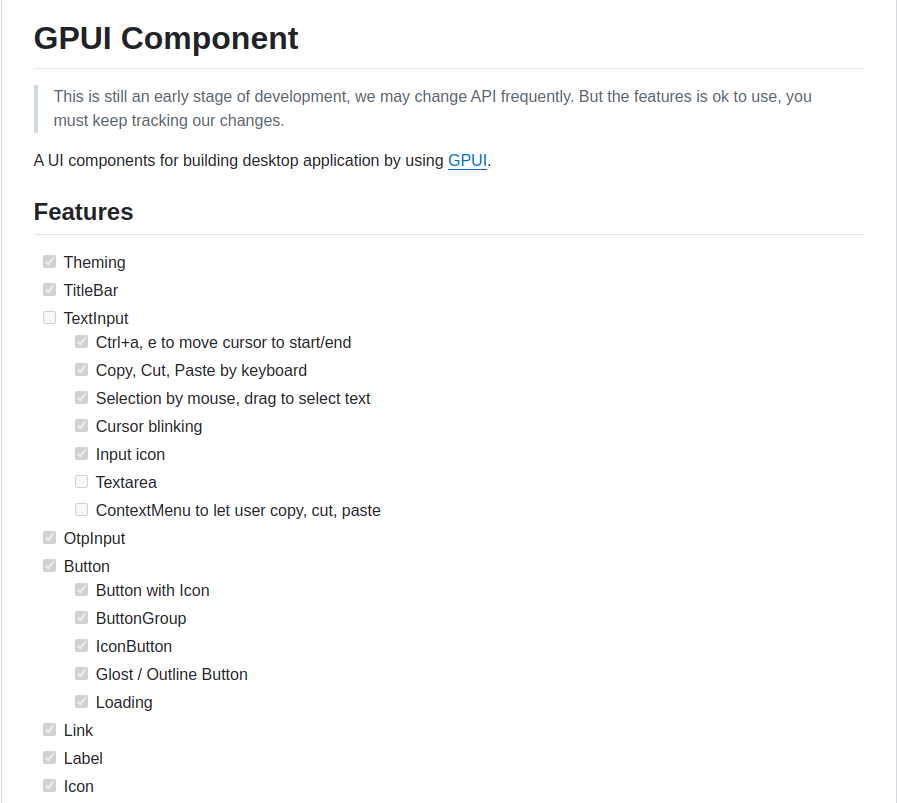
gpui-component 是基于 gpui 实现的一个组件库,是长桥(longbridge)主导的组件库,应用于股票交易的桌面应用,目前大部分的组件已经开发完成。如下图片展示了部分组件的完成进度,详细信息可以跳转到相关 github 仓库了解。

看一下 gpui-component 对 Button 结构体的定义和实现,Button 提供了 IntoElement 的实现(#[derive(IntoElement)]),符合视图渲染的接口要求。一个 button 包含了样式展示和事件的处理,样式可以通过 Styled 定制自己的需求,点击事件需要通过绑定 Listener 来监听事件,事件处理是一个异步回调的处理过程。
/// A Button element.
#[derive(IntoElement)]
pub struct Button {
    pub base: Div,
    id: ElementId,
    icon: Option<Icon>,
    label: Option<SharedString>,
    children: Vec<AnyElement>,
    disabled: bool,
    pub(crate) selected: bool,
    variant: ButtonVariant,
    rounded: ButtonRounded,
    border_corners: Corners<bool>,
    border_edges: Edges<bool>,
    size: Size,
    compact: bool,
    tooltip: Option<SharedString>,
    on_click: Option<Box<dyn Fn(&ClickEvent, &mut WindowContext) + 'static>>,
    pub(crate) stop_propagation: bool,
    loading: bool,
    loading_icon: Option<Icon>,
}
体验过用 Zed 开发后,不得不惊叹其渲染。如果后面需要开发桌面应用程序,优先可以考虑一下这套 UI 框。